Mastering Billing with Batch Claims
Name: Create Batch claims
Description: How to create a batch claim within Office Puzzle.
Difficulty: Middle
Duration: Less than 7 minutes
https://www.youtube.com/watch?v=OnGJmXzQo1A
Batch claims
Summary:
Step 1- From the Agency Dashboard, access Billing.
Step 2- Click on Batch Claims.
Step 3- Click on +New Batch.
Step 4- Select Payer.
Step 5- Select Health Plan.
Step 6- Select Clearing House (if needed/required).
Step 7- Click on Create.
Step 8- Within the batch, click on + Add claim.
Step 9- Select Other Claims / Events / Manual.
Step 10- If selected Events, then choose the Range of dates and click on Submit. Also, there are Optional filters: Providers, Credential types, Payers, Clients, Event types and Billing codes.
Step 11- Select the events to be included and hit Continue. (There you can check if there are any error on the events)
Step 12- Select Strategy: Merge all events, Split by Provider or Split by credential.
Step 13- Select the Claims to be added.
Step 14- Click on Add.
Create Batch claims
Step 1- From the Agency Dashboard, access Billing.
![]()
Step 2- Click on Batch Claims.
![]()
Step 3- Click on +New Batch.
![]()
Step 4- Select Payer.
![]()
Step 5- Select Health Plan.
![]()
Step 6- Select Clearing House (if needed/required).

Step 7- Click on Create.
![]()
Step 8- Within the batch, click on + Add claim.
![]()
Step 9- Select Other Claims / Events / Manual.
![]()
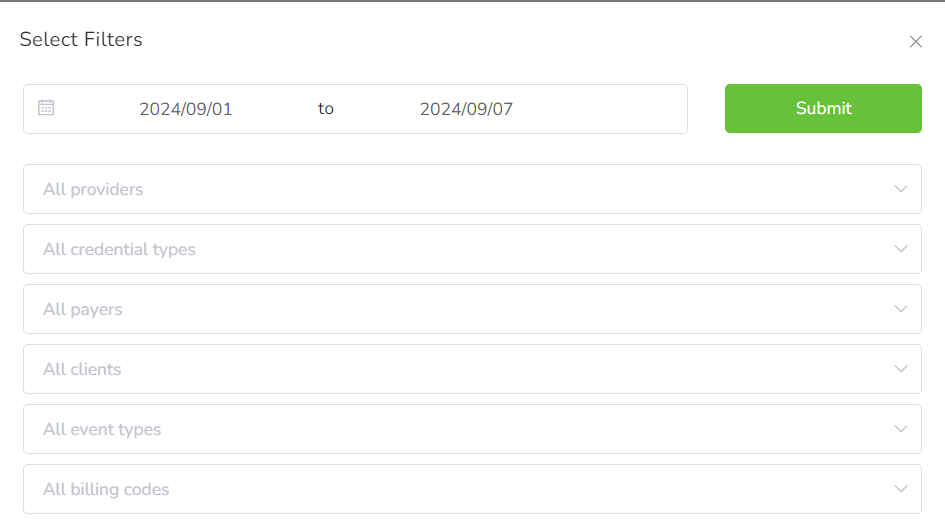
Step 10- If selected Events, then choose the Range of dates and click on Submit. Also, there are Optional filters: Providers, Credential types, Payers, Clients, Event types and Billing codes.
Step 11- Select the events to be included and hit Continue. (There you can check if there are any error on the events)

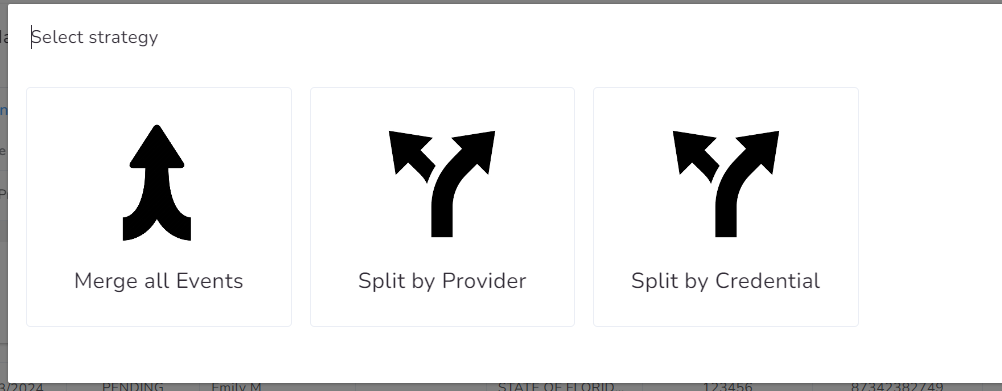
Step 12- Select Strategy: Merge all events, Split by Provider or Split by credential.
Step 13- Select the Claims to be added.
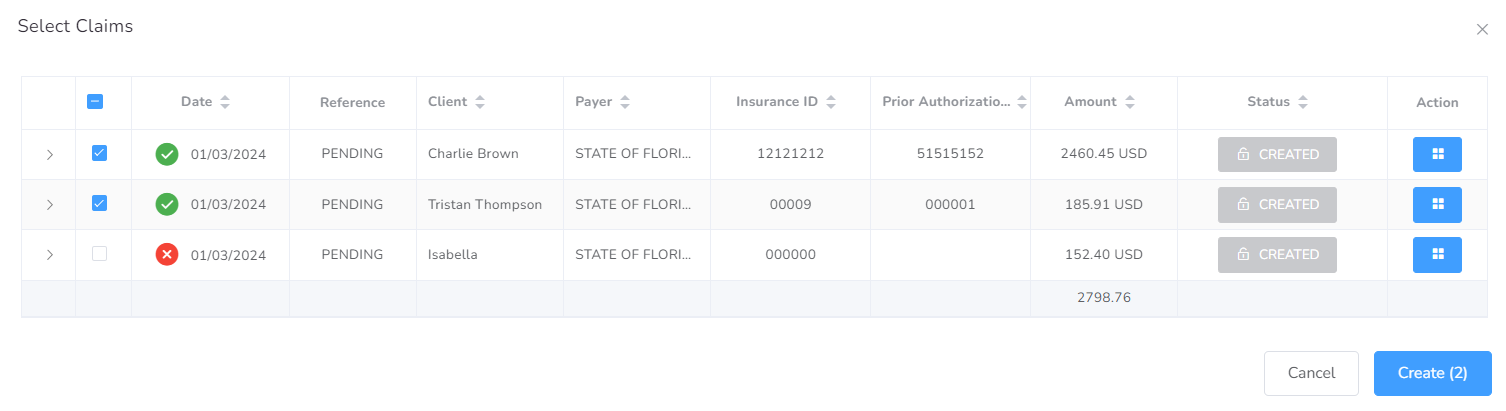
Step 14- Click on Add.
![]()

Billing via Availity
Availity will only accept Claims for the Payers listed: https://apps.availity.com/public-web/payerlist-ui/payerlist-ui/
This assumes you already followed the steps on how to generate the 837P from Office Puzzle described here: https://www.officepuzzle.com/tutorials/billing/
How to Upload a File in the Availity Portal
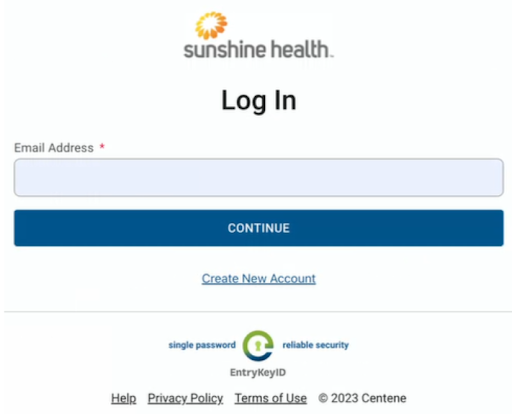
1. Log in to the Availity portal.
2. Click on Claims & Payments, then select Send and Receive EDI Files.

3. Select the organization name and click Submit.
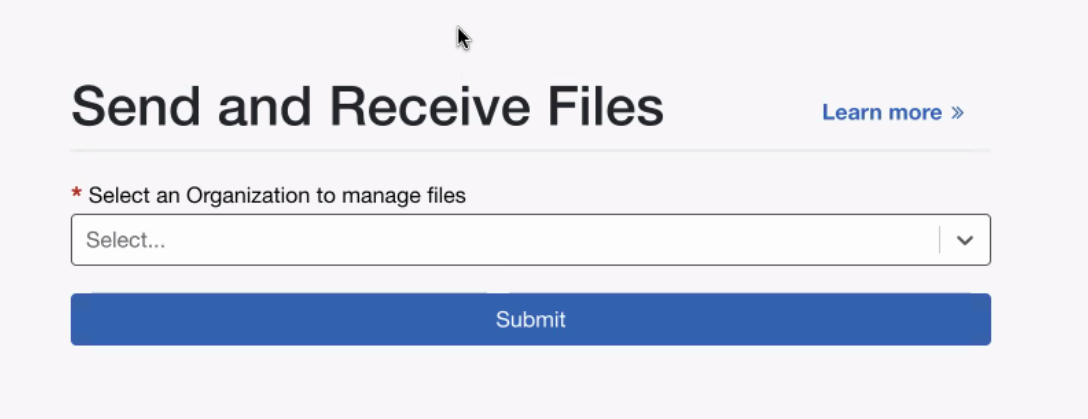
4. On the Send and Receive Files page, click the folder Send Files.
5. Choose the file you want to upload and click Submit to send it to Availity.
6. Check the receive files folder for Availity’s response
If you have any questions or issues during the process, check the batch status and ensure that you have followed each step correctly. 🚀

Billing via Sunshine Health (Centene)
Sunshine Health Portal (https://provider.sunshinehealth.com/careconnect/login/oauth2/code/pingcloud&brand=sunshinehealth) will only accept Claims for the following payers: CMS Title 21, CMS Title 19 and Ambetter.
How to Submit a Batch to the Sunshine Portal
Follow these steps to successfully upload a batch to the Sunshine Health portal.
1. Go to the Sunshine portal using the following link: 👉 Sunshine Health Portal.
2. Select the corresponding Plan Type and click Go Button.

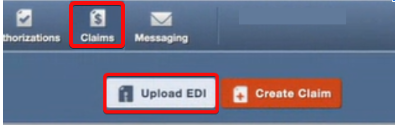
3. Navigate to the menu and click Claims → Upload EDI.
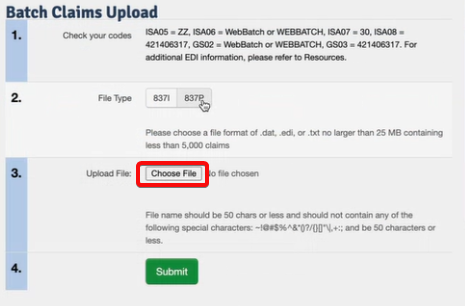
4. In the new window titled Batch Claims Upload, go to Step 2 and select the option 837P.

5. Click Choose File and select the file you previously downloaded from Office Puzzle.

6. Finally, click the Submit button to upload the file.
How to Verify That the Batch Was Uploaded Successfully
After uploading the batch, it is important to check that the system has received it correctly.
1. In the menu, click Claims → Batch.
2. Filter by the date you uploaded the batch and click Search.
3. The system will display a list of submitted batches:
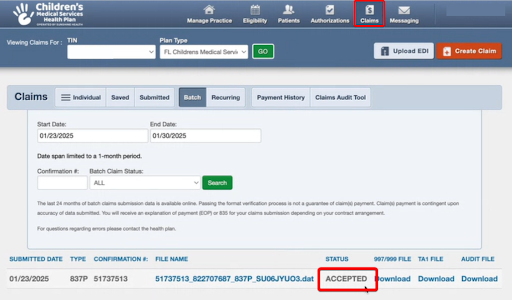
Accepted: The batch was received successfully.
Rejected: There was an error, and the batch was not accepted.
How to Check the Status of Each Claim
If you want to verify the individual status of each claim submitted, follow these steps:
1. In the menu, click Claims → Individual.
2. Filter by the date you need to check and click Search.
3. The system will display a list with the following details: client, billed amount, claim status
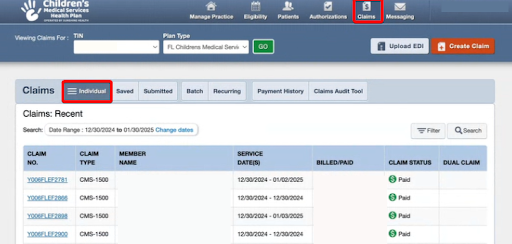
Paid: The claim has been paid.
Process: The claim is still being processed.
✅ Done!
By following these steps, you can successfully submit and verify your batches in the Sunshine Health portal. 😊
If you have any questions or issues during the process, check the batch status and ensure that you have followed each step correctly. 🚀
Billing via Claim.MD
Please remember Claim.MD is offering 20% discount to all accounts using Office Puzzle as their EMR. Simply mention this during registration or send a ticket requesting the discount.
Claim.MD will only accept Claims for the Payers listed: https://www.claim.md/payer-list
This assumes you already followed the steps on how to generate the 837P from Office Puzzle described here: https://www.officepuzzle.com/tutorials/billing/
Payer Enrollment
This is the process where we make sure Claim.MD is aware of which payers we are sending to, this also ensures we configure the ERA (Electronic Remittance Advice) to receive the payments once the claims are processed. Although this step is NOT mandatory is highly recommended.
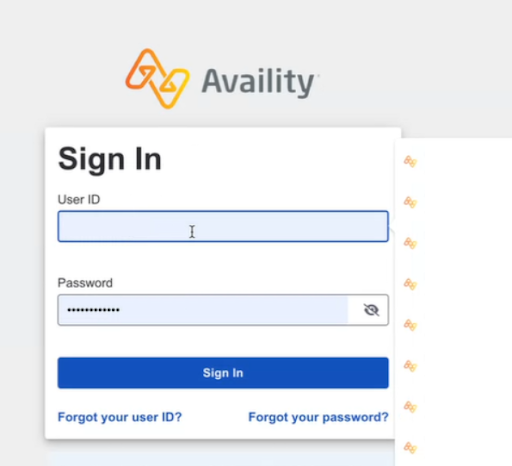
1. Go to the Claim MD portal https://www.claim.md
![]()
2. Enter your Claim.MD username and password to log in.

3. In the menu, go to Provider Enrollment.

4. In this section, locate the payers and click the Enrollment Required button.
5. Follow the provided instructions to complete the registration for each payer. This requires for you to register your Group NPI with Claim.MD for each payer.
6. Once all payers have been registered, you can proceed with the batch upload.
Note: The registration process may take some time to be completed. Make sure to check the status of each payer before proceeding.
Manually Uploading Claims
Uploading Files Manually
"Manually Uploading Claims" refers to the process of generating a batch file containing all claims for a specific provider from the Practice Management System or other software system. This file is typically in ANSI X12 format, although it may be in other formats such as PDF, CSV, XML, or others. The batch file is then saved in a local drive and uploaded into Claim.MD.
This assumes you already followed the steps on how to generate the 837P from Office Puzzle described here: https://www.officepuzzle.com/tutorials/billing/
To upload a claim:
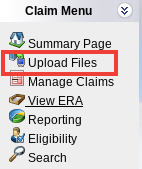
1. Click Upload Files on the left-hand navigation menu.
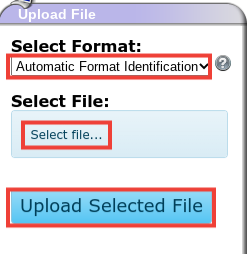
2. It is recommended to leave Select Format dropdown as Automatic Format Identification first.If the document is not being automatically read, try selecting the specific format (CSV, XLS, XML etc.) in the dropdown.
3. Click the Select File button
7. The Recent Uploads section of the page is where you can quickly view information about your batch file such as quantity of claims in the file, total amount for the claims, etc.8. Click the View Claims button to see the individual claims in the file.

You can find the original for this tutorial at https://docs.claim.md/docs/uploading-and-entering-claims
Clearing House integration
Name: Clearing House integration within Office Puzzle
Description: How to add a Clearing House to your account in Office Puzzle.
Difficulty: Middle
Duration: Less than 6 minutes
Please check https://www.officepuzzle.com/tutorials/billing/ for a standard billing
Summary:
Step 1- From the Agency Dashboard, access Billing.
Step 2- Click on Batch Claims.
Step 3- Click on +New Batch.
Step 4- Select Payer.
Step 5- Select Health Plan.
Step 6- If the Clearing House for the selected insurance is not configured, the system will prompt you to set it up. Click Yes.
If you already have a configured Clearing House select that integration if not select New Integration.
Step 7- Select the appropriate Clearing House for the payer and complete the required information, a Default Clearing House configuration is typically more than enough.
Step 8- Follow the rest of the steps described at: https://www.officepuzzle.com/tutorials/billing/
Clearing House integration within Office Puzzle
Step 1- From the Agency Dashboard, access Billing.
![]()
Step 2- Click on Batch Claims.
![]()
Step 3- Click on +New Batch.
![]()
Step 4- Select Payer.
![]()
Step 5- Select Health Plan.
![]()
Step 6- If the Clearing House for the selected insurance is not configured, the system will prompt you to set it up. Click Yes.

If you already have a configured Clearing House select that integration if not select New Integration.

Step 7- Select the appropriate Clearing House for the payer/health plan.

Complete the required information, a Default Clearing House configuration is typically more than enough.

Step 8- Follow the rest of the steps described at: https://www.officepuzzle.com/tutorials/billing/

Rate Changes for Medicaid in Florida
Important Update: Rate Changes for Medicaid in Florida
As you may have heard, the State of Florida is implementing changes to the Medicaid health plan rates effective October 1st, 2024. While we received this news with less than 3 days’ notice, let’s look on the bright side—after all, higher rates mean more funding to support our vital services! It’s almost like getting a surprise party, but instead of cake, we get… rates!
At Office Puzzle, we want to make sure you have the tools you need to navigate this transition smoothly.
We recommend a straightforward approach: only change the rates once you have finalized billing for the previous month, which includes everything up until September 30th.
And if you’re thinking about updating the rates early, here’s the funny part: even if you do it today, Medicaid won’t pay you the higher rate just yet! So if you want, you can update the rates right now and you will be fine. They will adjust to the correct rates.
To avoid any issues, check out our step-by-step guide on how to manually update your rates by following the instructions below or the quick video tutorial we’ll be providing. This will ensure everything runs smoothly without any surprises!
- Go to the Agency Dashboard
- Click Configuration
- Click Billing
- Click Payers
- Click on the Payer Name (STATE OF FLORIDA, MEDICAID, FLORIDA MEDICAID, etc)
- Look for the Health Plan, it's on the right. Click on the green pencil right next to the name of the Health Plan (Default, Medicaid, etc)
- Click the Rates Tab
- Find the Billing code you would like to update the rate and enter the new amount (find the changes below)
- Repeat step #8 three times since we have 3 rate changes (97153, 97155, 97155-HN)
The video instruction is here:
In case you missed the changes here is a quick summary of them:
| Service Description | Procedure Code | 2022 Rate (Per Unit) | 2022 Rate (Per Hour) | 2024 Rate (Per Unit) | 2024 Rate (Per Hour) | Fee Change (Per Unit) | Fee Change (Per Hour) |
|---|---|---|---|---|---|---|---|
| Behavior identification - assessment | 97151 | $19.05 | $76.20 | $19.05 | $76.20 | No change | No change |
| Behavior identification - supporting assessment | 97152 | $12.19 | $48.76 | $12.19 | $48.76 | No change | No change |
| Behavior reassessment | 97151 TS | $12.19 | $76.20 | $12.19 | $48.76 | No change | No change |
| Behavior treatment with protocol modification (Lead) | 97155 | $19.05 | $76.20 | $19.17 | $76.68 | +$0.12 | +$0.48 |
| Behavior treatment with protocol modification (Assistant) | 97155 HN | $15.24 | $60.96 | $15.37 | $61.48 | +$0.13 | +$0.52 |
| Behavior treatment by protocol (RBT/BCaBA/Lead) | 97153 | $12.19 | $48.76 | $12.26 | $49.04 | +$0.07 | +$0.28 |
| Family training by Lead Analyst | 97156 | $19.05 | $76.20 | $19.05 | $76.20 | No change | No change |
| Family training via telemedicine (Lead Analyst) | 97156 GT | $19.05 | $76.20 | $19.05 | $76.68 | No change | No change |
| Family training by assistant | 97156 HN | $15.24 | $60.96 | $15.24 | $60.96 | No change | No change |
Thank you for your continued partnership as we work together through these changes!
Payments & Invoice Efficient Integration
Name: Creating and Managing Invoices on the Agency’s Payment section at Office Puzzle
Description: How to create an invoice on the Agency’s Payment section.
Difficulty: Middle
Duration: Less than 10 minutes
Invoices
Summary:
Step 1- From the Agency Dashboard, access Payments shortcut.
Step 2- Click on Invoices.
Step 3- Click on +New invoice.
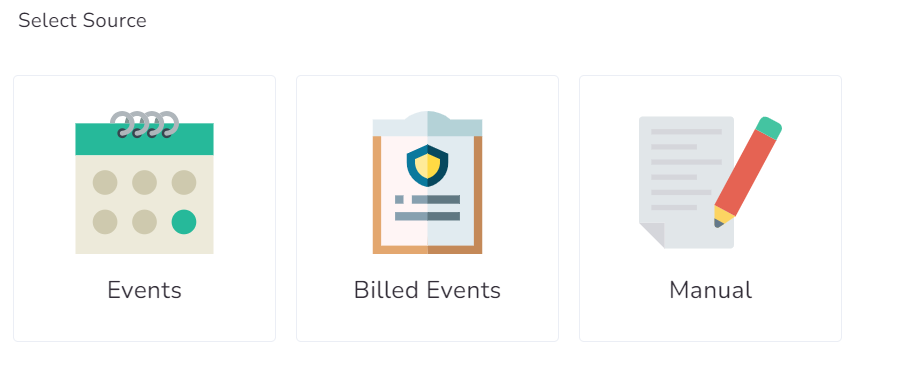
Step 4- Select Source: Events, Billed Events or Manual.
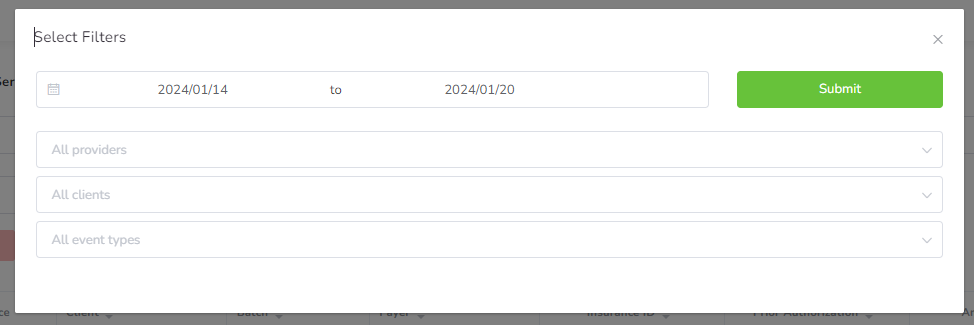
Step 5- If selected Events/Billed events, then choose the Range of dates and click on Submit. Also, there are Optional filters: Providers, Clients and Event types.
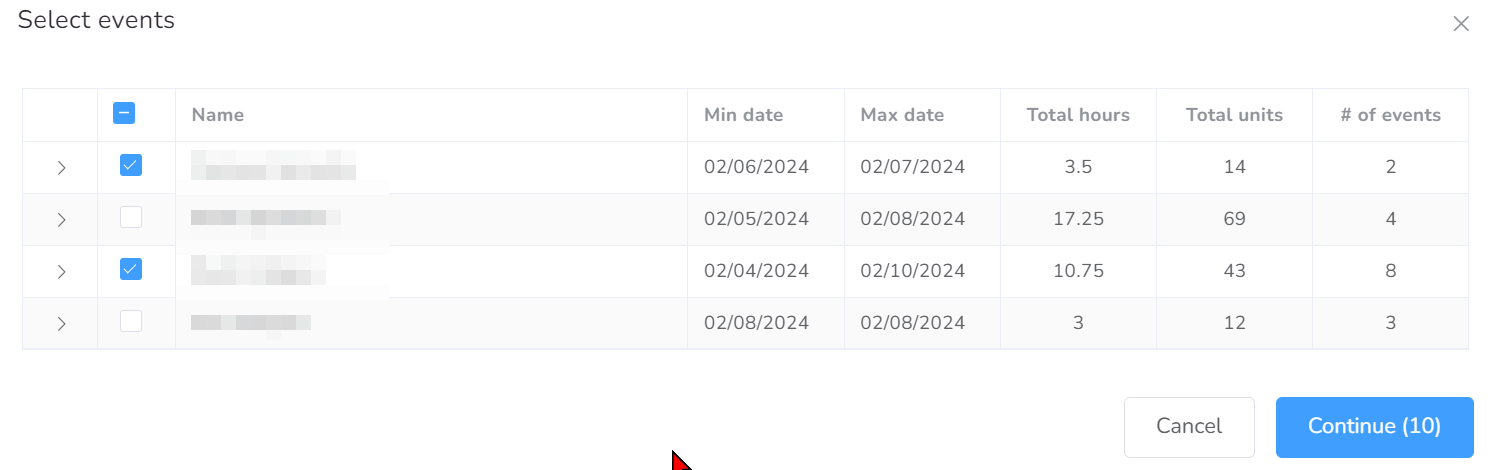
Step 6- Select the events to be included and hit Continue. (There you can check if there are any error on the events)
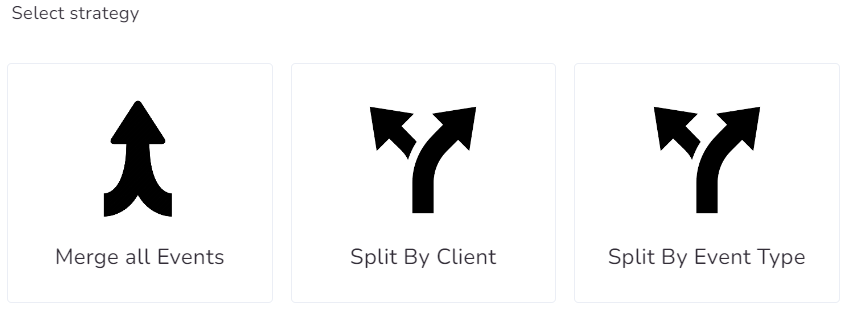
Step 7- Select Strategy: Merge all Events, Split by Provider or Split by Event Type.
Step 8- Select the Invoices to be created.
Step 9- Click on Create.
Create Invoices on the Agency’s Payments section
Invoices
Step 1: Navigate to the Agency Dashboard and access the Payments shortcut.

Step 2: Click on the "Invoices" box.
Step 3: Initiate a new invoice by clicking on "+New Invoice."

Step 4: Choose the source of the invoice: Events, Billed Events, or Manual.
Step 5: If Events/Billed Events is selected, specify the date range and click "Submit." Optional filters such as Providers, Clients, and Event types can be applied.
Step 6: Select the events to be included in the invoice and proceed by clicking "Continue." This step also allows you to check for any errors in the selected events.
Step 7: Opt for a strategy to organize the invoice: Merge all Events, Split by Provider, or Split by Event Type.
Step 8: Choose the specific invoices you want to create.
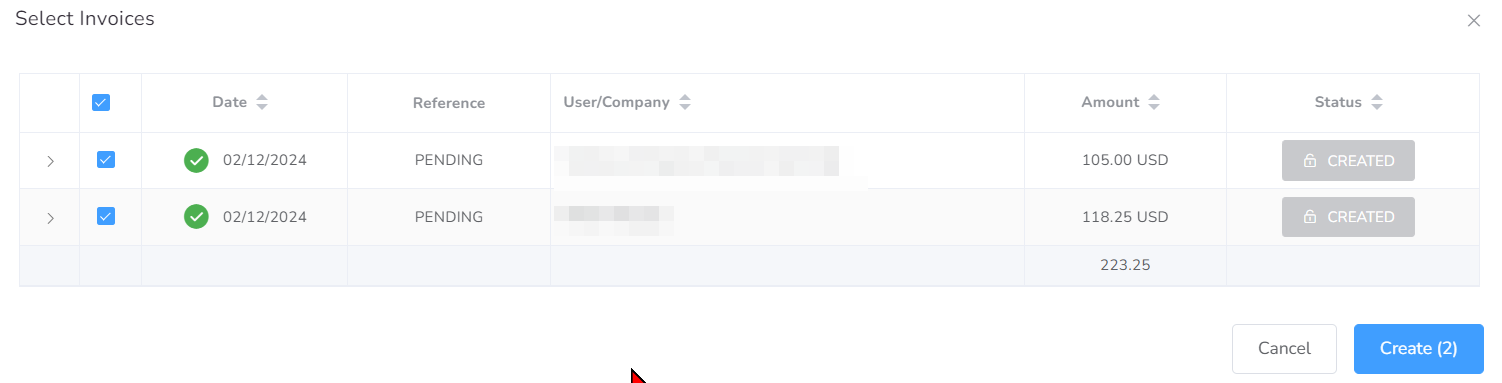
Step 9: Finalize the process by clicking "Create."
![]()
A Step-by-Step Guide to Evaluate Objectives
Evaluating objectives is a crucial step in managing and organizing Short Term Objectives (STOs) within the Office Puzzle system. This tutorial will guide you through the process of adding mastered dates for STOs by utilizing the “Evaluate Objectives” functionality. By following these steps, you'll be able to efficiently set and manage key dates associated with your objectives.
- Step 1: Navigate to the client's Dashboard.
- Step 2: Locate and click on the “Data” shortcut.
- Step 3: Within the Data section, find and click on the “Datasheets” option.
- Step 4: On the Datasheets page, look for the prominently displayed “Bulk Actions” button. Click on this button to access a dropdown list containing several options for managing your objectives.
- Step 5: From the dropdown list, choose the “Evaluate Objectives” option.
- Step 6: Upon selecting Evaluate Objectives, a table will display various categories and items related to your objectives. This table includes information about the objectives, along with the proposed mastered dates.
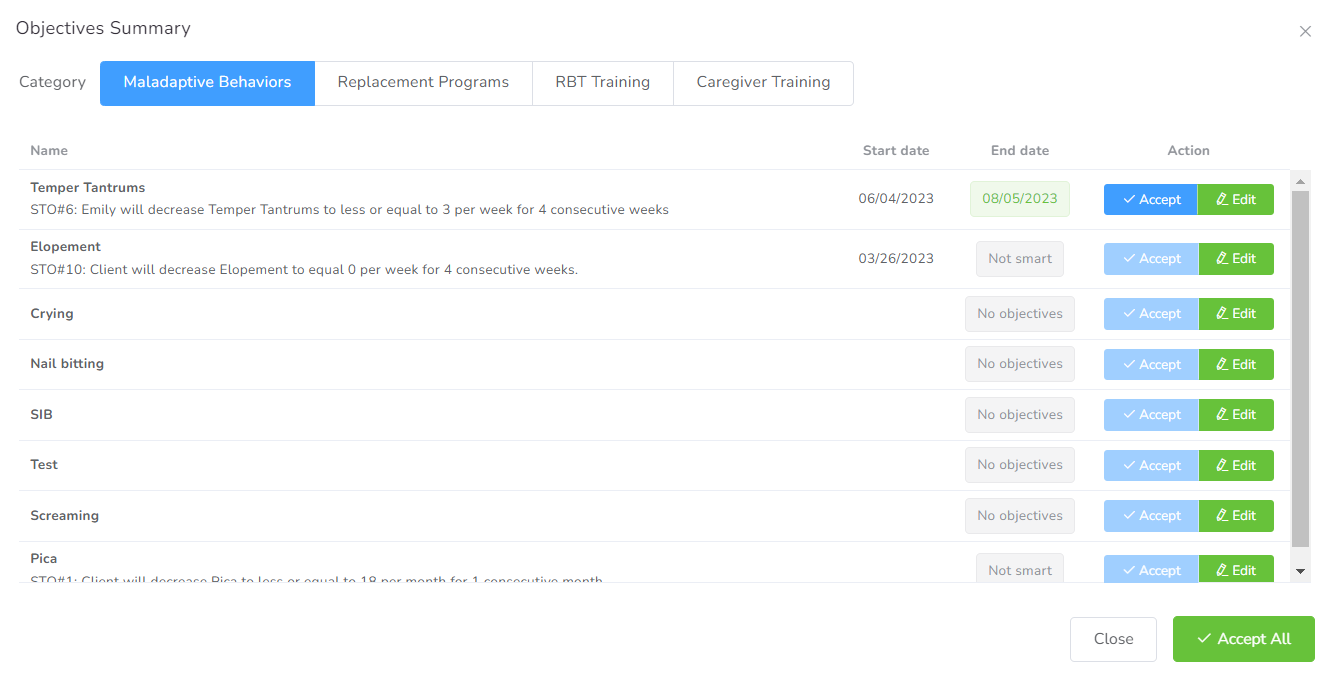 Step 7: In the table, you will see the option to either “Accept” the suggested mastered date or “Edit” it as needed. Evaluate each objective and decide the appropriate action based on your requirements.
By following these steps, you can efficiently evaluate objectives and manage mastered dates for STOs in the Office Puzzle system. This functionality streamlines the process of setting key dates, ensuring that your objectives align with your client's progress. Make use of the Evaluate Objectives feature to enhance your workflow and keep your Objectives on track.

Florida Medicaid Trading Partner ID & EDI Agreement
Name: Florida Medicaid Trading Partner ID and EDI Agreement
Description: Configuring Florida Medicaid portal for EDI files submission.
Difficulty: Medium
Duration: 15 minutes
Summary:
Step 1: Visit http://home.flmmis.com.
Step 2: Log into the secure Web Portal using your account credentials.
Step 3: Select Providers.
Step 4: Choose demographic maintenance.
Step 5: Select EDI Agreement.
Step 6: Select the transaction types.
Step 7: Add billing contact information.
Step 8: Read and Accept the agreement.
Step 9: Click “SAVE” at the end of the screen.
Step 10: Save the Trading Partner ID (TPID).
Florida Medicaid Trading Partner ID and EDI Agreement
Step 1: Visit http://home.flmmis.com
Step 2: Log into the secure Web Portal using your account credentials
Step 3: From the secure Web Portal landing page, select Providers
Step 4: Below the Providers option, choose demographic maintenance.
Step 5: From the Provider Informational panel, select EDI Agreement.
Providers without an existing Trading Partner ID (TPID) will see the message indicating that there is no TPID on file for the Provider ID. Users will indicate the transaction types they plan to send or receive under their TPID by selecting the checkbox next to the appropriate transaction.
If you already have a Trading Partner ID Steps 6 and 7 will not apply.
Step 6: Select the following transaction types:
- 270/271 270/271 Health Care Eligibility Benefit Inquiry and Response
- 276/277 Claim Status Request and Response
- 837 Professional Health Care Claim
Step 7: Add billing contact information (name, email, and phone)
Step 8: Read and Accept the agreement, basically accepting the process of submitting this type of file electronically.
Step 9: Click “SAVE” at the end of the screen.
Successful submission will produce the following message, which displays the user’s new TPID.
Step 10: Save the Trading Partner ID (TPID) as we will need this information.
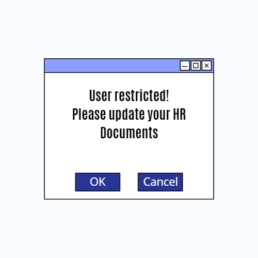
Restrict user due to missing HR documents.

Name: Restrict user due to missing HR documents.
Description: How to restrict user actions if they have missing or expired documents.
Difficulty: Easy
Duration: Less than 2 minutes
Summary:
1. Go to the Agency's Dashboard.
2. Click on Configuration.
3. Scroll down till HR Documents.
4. Click the Edit button of the document(s) you would like to restrict the user if it is missing or expired.
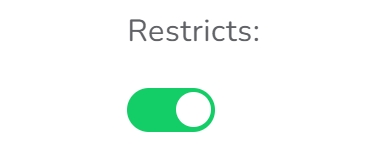
5. On the new window, enable the “Restricts” feature.
6. Finally, click on “Update”.
- Important - These restrictions do not apply to Administrators of the Agency.
Restrict user actions due to missing or expired documents.
Step 1: Go to the Agency's Dashboard.

Step 2: Click on Configuration.
Step 3: Scroll down till HR Documents.

Step 4: Click the Edit button of the document(s) you would like to restrict the user if it is missing or expired.
![]()
Step 5: On the new window, enable the “Restricts” feature.
Step 6: Finally, click on “Update”.