Please remember Claim.MD is offering 20% discount to all accounts using Office Puzzle as their EMR. Simply mention this during registration or send a ticket requesting the discount.
Claim.MD will only accept Claims for the Payers listed: https://www.claim.md/payer-list
This assumes you already followed the steps on how to generate the 837P from Office Puzzle described here: https://www.officepuzzle.com/tutorials/billing/
Payer Enrollment
This is the process where we make sure Claim.MD is aware of which payers we are sending to, this also ensures we configure the ERA (Electronic Remittance Advice) to receive the payments once the claims are processed. Although this step is NOT mandatory is highly recommended.
1. Go to the Claim MD portal https://www.claim.md
![]()
2. Enter your Claim.MD username and password to log in.

3. In the menu, go to Provider Enrollment.

4. In this section, locate the payers and click the Enrollment Required button.
5. Follow the provided instructions to complete the registration for each payer. This requires for you to register your Group NPI with Claim.MD for each payer.
6. Once all payers have been registered, you can proceed with the batch upload.
Note: The registration process may take some time to be completed. Make sure to check the status of each payer before proceeding.
Manually Uploading Claims
Uploading Files Manually
“Manually Uploading Claims” refers to the process of generating a batch file containing all claims for a specific provider from the Practice Management System or other software system. This file is typically in ANSI X12 format, although it may be in other formats such as PDF, CSV, XML, or others. The batch file is then saved in a local drive and uploaded into Claim.MD.
This assumes you already followed the steps on how to generate the 837P from Office Puzzle described here: https://www.officepuzzle.com/tutorials/billing/
To upload a claim:
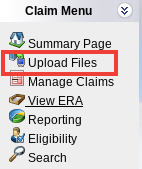
1. Click Upload Files on the left-hand navigation menu.
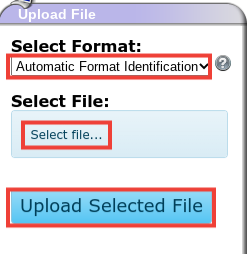
2. It is recommended to leave Select Format dropdown as Automatic Format Identification first.If the document is not being automatically read, try selecting the specific format (CSV, XLS, XML etc.) in the dropdown.
3. Click the Select File button
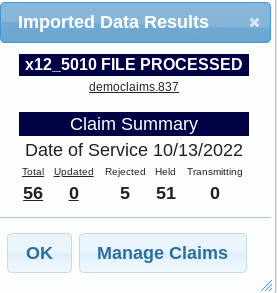
7. The Recent Uploads section of the page is where you can quickly view information about your batch file such as quantity of claims in the file, total amount for the claims, etc.8. Click the View Claims button to see the individual claims in the file.

You can find the original for this tutorial at https://docs.claim.md/docs/uploading-and-entering-claims