Billing via Availity
Availity will only accept Claims for the Payers listed: https://apps.availity.com/public-web/payerlist-ui/payerlist-ui/
This assumes you already followed the steps on how to generate the 837P from Office Puzzle described here: https://www.officepuzzle.com/tutorials/billing/
How to Upload a File in the Availity Portal
1. Log in to the Availity portal.
2. Click on Claims & Payments, then select Send and Receive EDI Files.
3. Select the organization name and click Submit.
4. On the Send and Receive Files page, click the folder Send Files.
5. Choose the file you want to upload and click Submit to send it to Availity.
6. Check the receive files folder for Availity’s response
If you have any questions or issues during the process, check the batch status and ensure that you have followed each step correctly. 🚀
Billing via Sunshine Health (Centene)
Sunshine Health Portal (https://provider.sunshinehealth.com/careconnect/login/oauth2/code/pingcloud&brand=sunshinehealth) will only accept Claims for the following payers: CMS Title 21, CMS Title 19 and Ambetter.
How to Submit a Batch to the Sunshine Portal
Follow these steps to successfully upload a batch to the Sunshine Health portal.
1. Go to the Sunshine portal using the following link: 👉 Sunshine Health Portal.
2. Select the corresponding Plan Type and click Go Button.
3. Navigate to the menu and click Claims → Upload EDI.
4. In the new window titled Batch Claims Upload, go to Step 2 and select the option 837P.
5. Click Choose File and select the file you previously downloaded from Office Puzzle.
6. Finally, click the Submit button to upload the file.
How to Verify That the Batch Was Uploaded Successfully
After uploading the batch, it is important to check that the system has received it correctly.
1. In the menu, click Claims → Batch.
2. Filter by the date you uploaded the batch and click Search.
3. The system will display a list of submitted batches:
Accepted: The batch was received successfully.
Rejected: There was an error, and the batch was not accepted.
How to Check the Status of Each Claim
If you want to verify the individual status of each claim submitted, follow these steps:
1. In the menu, click Claims → Individual.
2. Filter by the date you need to check and click Search.
3. The system will display a list with the following details: client, billed amount, claim status
Paid: The claim has been paid.
Process: The claim is still being processed.
✅ Done!
By following these steps, you can successfully submit and verify your batches in the Sunshine Health portal. 😊
If you have any questions or issues during the process, check the batch status and ensure that you have followed each step correctly. 🚀
Billing via Claim.MD
Please remember Claim.MD is offering 20% discount to all accounts using Office Puzzle as their EMR. Simply mention this during registration or send a ticket requesting the discount.
Claim.MD will only accept Claims for the Payers listed: https://www.claim.md/payer-list
This assumes you already followed the steps on how to generate the 837P from Office Puzzle described here: https://www.officepuzzle.com/tutorials/billing/
Payer Enrollment
This is the process where we make sure Claim.MD is aware of which payers we are sending to, this also ensures we configure the ERA (Electronic Remittance Advice) to receive the payments once the claims are processed. Although this step is NOT mandatory is highly recommended.
1. Go to the Claim MD portal https://www.claim.md
2. Enter your Claim.MD username and password to log in.
3. In the menu, go to Provider Enrollment.
4. In this section, locate the payers and click the Enrollment Required button.
5. Follow the provided instructions to complete the registration for each payer. This requires for you to register your Group NPI with Claim.MD for each payer.
6. Once all payers have been registered, you can proceed with the batch upload.
Note: The registration process may take some time to be completed. Make sure to check the status of each payer before proceeding.
Manually Uploading Claims
Uploading Files Manually
"Manually Uploading Claims" refers to the process of generating a batch file containing all claims for a specific provider from the Practice Management System or other software system. This file is typically in ANSI X12 format, although it may be in other formats such as PDF, CSV, XML, or others. The batch file is then saved in a local drive and uploaded into Claim.MD.
This assumes you already followed the steps on how to generate the 837P from Office Puzzle described here: https://www.officepuzzle.com/tutorials/billing/
To upload a claim:
1. Click Upload Files on the left-hand navigation menu.
![](https://www.officepuzzle.com/wp-content/uploads/2025/02/step1.png)
2. It is recommended to leave Select Format dropdown as Automatic Format Identification first.If the document is not being automatically read, try selecting the specific format (CSV, XLS, XML etc.) in the dropdown.
3. Click the Select File button
![](https://www.officepuzzle.com/wp-content/uploads/2025/02/step3.png)
![](https://www.officepuzzle.com/wp-content/uploads/2025/02/step6.png)
7. The Recent Uploads section of the page is where you can quickly view information about your batch file such as quantity of claims in the file, total amount for the claims, etc.8. Click the View Claims button to see the individual claims in the file.
You can find the original for this tutorial at https://docs.claim.md/docs/uploading-and-entering-claims
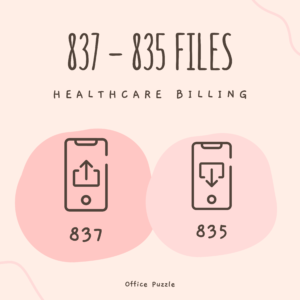
Understanding 835 and 837 files in Billing
The healthcare industry relies heavily on accurate and efficient billing processes to ensure the smooth flow of financial transactions between providers and payers. Two essential components of this process are the 835 and 837 files. These files play a crucial role in healthcare claims and remittance. In this article, we will explore what 835 and 837 files are, how they work, and their significance in the healthcare billing process.
What is an 837 File?
An 837 file is an electronic claim submission document used by healthcare providers to submit claims for reimbursement to payers. It contains comprehensive information about the services provided to patients, along with associated diagnosis and procedure codes. The 837 file is the format in which providers send billing information to payers electronically.
Key components of an 837 file include:
- Patient Information: Demographic details of the patient, such as name, date of birth, and insurance information.
- Provider Information: Information about the healthcare provider, including their NPI and contact details.
- Service Details: Descriptions of the services rendered, including CPT (Current Procedural Terminology) codes and ICD-10 (International Classification of Diseases, 10th Edition) diagnosis codes.
- Payer Information: Details about the insurance payer responsible for processing the claim.
- Claim Totals: Summaries of the charges, payments, and adjustments related to the claim.
Once the healthcare provider submits the 837 file to the payer, the payer processes the claim, which may result in the creation of an 835 file that provides information on the payment and any adjustments made.
What is an 835 File?
An 835 file, often referred to as an Electronic Remittance Advice (ERA), is an electronic document that provides detailed information about the payments and adjustments made by a healthcare payer (such as an insurance company or Medicare) to a healthcare provider. Essentially, it serves as a remittance advice that explains how a claim was processed and paid. Key information contained in an 835 file includes:
- Payment Details: This section includes the payment amount, payment method (e.g., electronic funds transfer), and payment date.
- Claim Information: It provides data related to the specific claim being paid, such as the claim number, patient information, and service details.
- Adjustments and Denials: Any adjustments or denials made to the claim are documented in this section. It explains why certain services were not covered or were partially paid.
- Provider Information: Details about the healthcare provider receiving the payment, including their name, National Provider Identifier (NPI), and address.
- Payer Information: Information about the healthcare payer responsible for processing the claim, including their name, payer ID, and contact information.
The 835 file is crucial for healthcare providers to reconcile their accounts receivable, understand the payment rationale, and address any discrepancies in payments.
The Relationship Between 835 and 837 Files
The 835 and 837 files are interconnected in the healthcare billing process. Here's how they work together:
- Claim Submission: Healthcare providers use the 837 file to submit claims electronically to payers.
- Claim Processing: Payers receive the 837 file, process the claim, and determine the appropriate reimbursement.
- 835 Generation: If the claim is approved, the payer generates an 835 file, which is sent back to the provider. This 835 file explains how the claim was processed and the payment details.
- Reconciliation: Healthcare providers use the information in the 835 file to reconcile their accounts and ensure they received the correct payment for services rendered.
- Resolution: If there are discrepancies or denials, providers can use the information in the 835 file to address these issues with the payer.
Office Puzzle ensures that agencies comply with HIPAA requirements while optimizing their billing management. One of the features of our platform specializes in the creation of 837 files and the ability to upload 835 files to the platform in the raw. The system identifies claims and batch issues that can hinder payment accuracy, as well as prevents specific denial issues.